Introduction
I first came across tri-tip steak when I was on the hunt for an alternative cut. After years of cooking rib-eyes and sirloins, I was ready for a challenge. I bought the cut, but was overwhelmed with the number of ways that I could cook it. Some recipes suggested that I grill it or use it as part of a chili con carne.
I did my research and decided to go for a reverse sear tri tip. The results were juicy and delicious. Here’s how I did it:
What is a Tri Tip and Why you Should Buy It
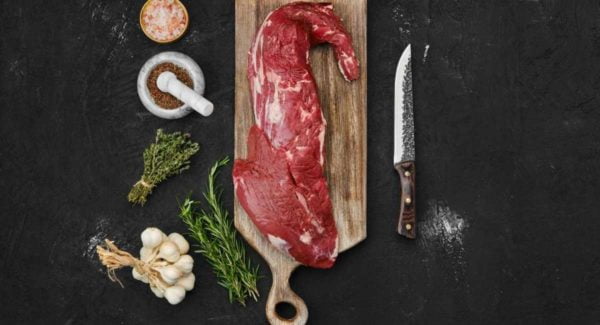
The tri-tip is a triangular cut that comes from the bottom part of the cow. If you’re like me and don’t have any idea where that is, just know that it comes from a juicy part that produces marbled meat (yes, like Wagyu type marbled).

Unlike other prime cuts, it’s affordable and incredibly versatile. Though reverse searing is the most popular way to cook it, you can also braise it or straight-up grill it. You can also cut it in different ways and use it as sandwich filling or serve as a roast.
It’s worth adding to your menu because it’s easy to cook and it locks in flavor. If you buy a cut with fat trimmings, the fat will stick on to create a flavorful crust. It absorbs spices and marinade so well that it’s not likely to get overpowered in any dish. Also, it helps that the meat remains tender even if you cook it under high heat.
You can find tri-tip in any butcher store in the country. If it’s not referred to as tri-tip it might be called a ‘Santa Maria Cut’ or a ‘Bottom Sirloin Cut.’ If you still can’t find it in-store then you can buy it online from reputable online retailers.
I bet you’re curious to learn more about how to reverse sear tri tip. Let’s do this.
Picking the Right Tri Tip
As any great chef knows, selecting the perfect cut is a must-have component of any quality steak. You should choose a cut that shines without overpowering the rest of the meal. According to Anna Tasier, a popular butcher shop owner, you should pick tri-tip with a red color and good marbling. If you can afford the Wagyu, then go ahead and splurge on that.
Grass-fed tri-tip is better than the non-organic options. You can take it a step further by buying a choice or prime cut. It’s hard for us to decide whether you should buy the cut with fat trimmings or not because it tastes fantastic either way. Ultimately, the choice is up to you and what kind of flavors you enjoy.
Seasoning the Tri-Tip and Getting the Grill Ready
Tri-tip is best seasoned using a Santa Maria style. Despite the fancy name, it’s actually quite simple, and you can do it even if you’re a novice. All you need to do is grab your salt, pepper, and garlic salt and mix it to create a beautiful blend. You can also add cayenne pepper and dried herbs if you want to add some extra flair. You can choose to use this blend as a dry seasoning or a wet paste.
Once you’ve created the blend, just massage it into the steak and then wait to reverse sear it. If you choose to use a wet paste, you can marinate the meat for a few hours before cooking it. If you’re like me and enjoy a full flavor profile, then marinating it for a few hours is the ideal choice.
Getting your Smoker/Grill Ready

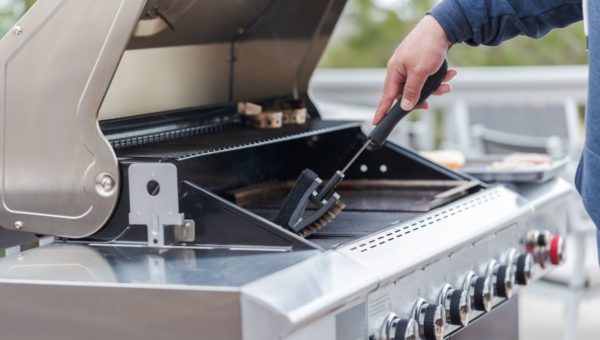
Take time to prepare your grill while you’re waiting for the marinade to set. An essential step in the reverse searing process is ensuring that the meat is well cooked before searing it. You want to trap all those delectable flavors before searing your meat.
Since slow cooking is the first step of the process, it matters what kind of wood you use. I recommend that you use red oak if you’re aiming to capture the original Central California flavor that the tri-tip is usually associated with. You can also use other hardwoods like hickory and pecan to impart a wonderful smoky flavor.
The desired temperature for the perfect medium-rare tri-tip sits between 200 and 275°F. Try your best to maintain this temperature so that your tri-tip is evenly cooked. You wouldn’t want it getting dry after you sear it. One of the benefits of reverse searing is serving more tender meat.
If you’re not using a smoker or a grill, you can preheat your oven instead. Don’t forget that you’ll need a rack on which to place the meat and a tray to catch the juices if you’re using an oven for cooking. Don’t worry about the quality of the meat if you’re using an oven, not a grill. Of course, you might miss out on the smoke flavor, but you can still enjoy the beefy flavors.
How to Smoke and Reverse Sear Tri Tip
Once your grill is ready to go, take your tri-tip out of the fridge and prepare it for the smoking process. If you chose to marinade it, you should wipe off any remaining liquid with a paper towel and rub a bit of kosher salt into the meat. If you initially used a dry rub, don’t worry about this step.
Once the steak is also ready, carefully slide it into the grill. Leave it alone for at least 10 minutes (to make sure the flavors settle) before opening the grill. Once it’s been in there for a while, don’t forget to check it regularly so that it doesn’t overcook. The same conditions apply to oven grilling.
Maintain the same temperature until the steak reaches an internal temperature of 110°F. Just remember that this temperature is not universal; it depends on your steak’s thickness. You can calculate the temperature for the perfect medium-rare steak here. It will probably take an hour to an hour and a half to fully cook the tri-tip.
If you’re unsure about how hot your oven/grill is, heat it to a high temp then switch it off before putting the steak in. If you use a grill, make sure that you keep the steak away from the flames and cook the meat using leftover heat from the coals. Heat regulation is easier with an oven because most ovens have thermostat settings to control how hot it gets.
Searing the Steak
Once the meat reaches the desired temperature, take it off the grill (or out of the oven) and set it aside in foil. The foil is to prevent moisture loss. Increase the grill’s temperature to 500°F to prepare for the searing stage. If you have more than one grilling option, feel free to use a gas grill instead. You could also set your oven to the grill option if it has one.
The searing process requires your full attention. It’s at this stage that your steak will either have nice grill marks, look like a charcoal grill or just look plain dry. Searing only takes about 5 minutes if the cut is thin and 10-15 minutes if it’s a thick cut. Don’t forget to flip the meat to ensure that it’s nicely seared on both sides.
The best way to tell whether your steak is perfectly seared is by following your instinct. There’s no foolproof way to tell whether it’s ready, but you’ll know by looking at it. If it has a beautiful brown color, it’s probably ready. If it gets a charcoal color then it’s probably been on for too long and you should remove it ASAP.
Serving the Tri-Tip
Once you’ve seared the meat, let it rest for 10 minutes before you cut it. How you cut it depends on how you want to use the steak. If you’re making a sandwich or similar dish, you can cut it into thin slices or shred it. It also makes a memorable roast accompanied by mashed potatoes or rice and gravy. You can also serve it like steak with spicy salsa or oven-baked potatoes. Get creative.
Either way, tri-tip is a versatile cut that can be enjoyed whichever you like. After all, you’ll have earned the right to indulge after going through the complete reverse searing process.
Summary
Now that doesn’t seem so hard, does it? Once you read through the instructions more than once you’ll realize that the process is actually quite simple. Hearing the words reverse sear tri tip might be terrifying, but getting the hang of it is much less challenging.
The trouble lies in finding the perfect cut (because I can’t help much with that part) but once you commit, just refer back to this guide and find what you missed. I know that you’re capable of cooking a juicy tri-tip steak, and I wish that I could also get a taste!
Last Updated on June 11, 2021 by Judith Fertig
Leave a Reply